How to put on your waist trainer
Waist Trainers come with 3 rows of hook-and-eye closures so that you can size down as you progress.
The first time is gonna be a harder time for you! Below are some instructions on how to put it on:
- The waist trainer should be worn underneath your clothes to promote heat and perspiration.
- Start on the row that you will feel comfortable with (usually the first, loosest row).
- When putting the trainer on, wrap it around yourself situating the bottom of the waist trainer above your midsection or the area that most protrudes outward. The hooks should be on the right side, and the eyes on the left. Sucking in helps.
- Start with the bottom hook first. Grip the trainer from the bottom (one hand on each side) and overlap the two sides until you can fasten the bottom hook. Keep in mind, the trainer has some stretch to it. Don’t worry about where the trainer is positioned at this point – we will pull it down and adjust on the next step.
- After fastening the bottom-most hook, pull the trainer down slightly over your midsection. Move your hands to grip the trainer around the middle now and fasten the next hook from the bottom. Gradually work your way up, securing the rest of the hooks and pulling the trainer down to position it as needed. It is normal for some of the hooks to unfasten as you move upward – simply rehook them.
- Move your hands upward as you work your way up until you get to the top hooks. Grip both sides of the trainer with each hand from the top as you secure these final hooks. Adjust your trainer so that it sits, straightened, throughout the length of your torso.
- Once complete, you are ready to go on with your day allowing the waist trainer to do its job. Wearing it during workouts provides the best results as it offers further concentration on your abdominal core to boost thermal activity.

×
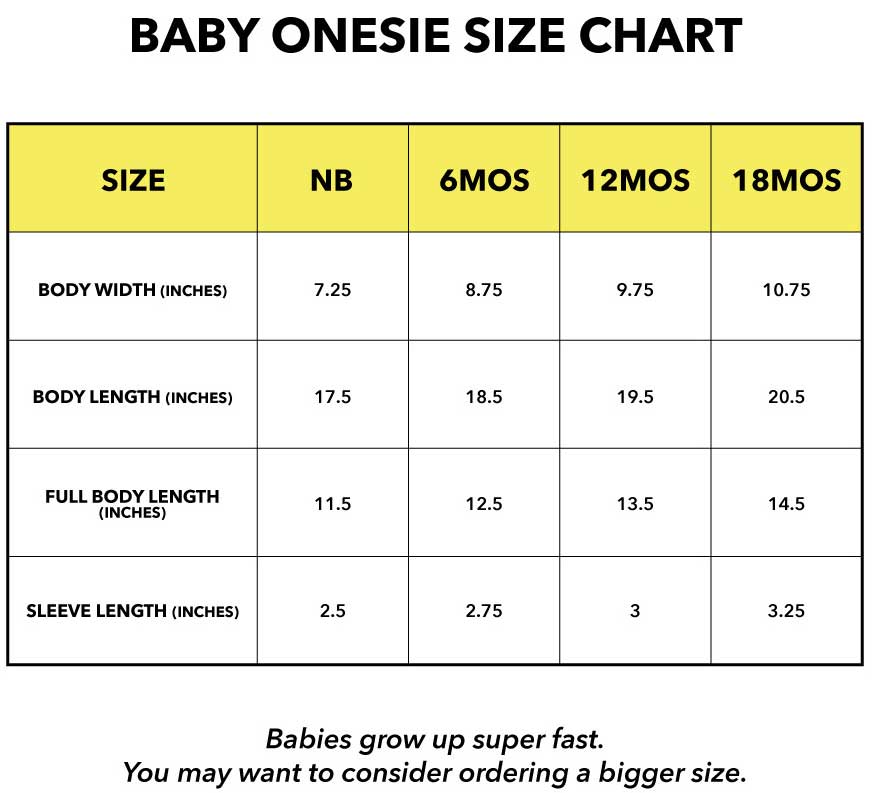
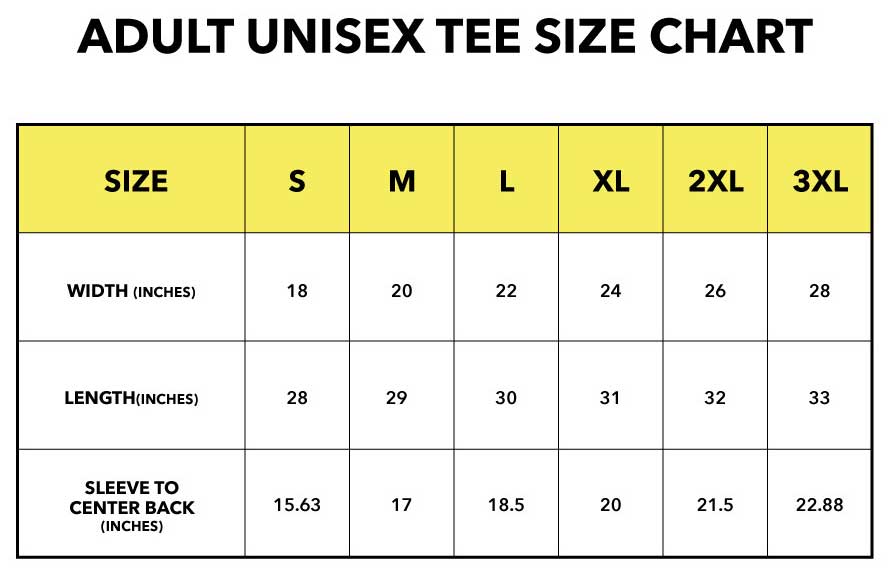
Size Chart
×
Size Chart

Main Menu
Get Help
About Us
WHAT IS A WAIST TRAINER?
A waist trainer is helpful in your efforts to lose weight gradually.
We have researched and selected the best Waist Trainers available anywhere. We ensure...
Read More
© 2024 WaistTrainingAngels.com. Email: info@waisttrainingangels.com
X